Setting Up OAuth Client for FlashPipe
This page describes the steps to set up an OAuth client for use with FlashPipe.
Required Roles and Role-Templates
FlashPipe relies heavily on access to SAP Integration Suite’s public APIs. As such, it requires specific roles/role-templates in order to be able to access those APIs. Following are the tasks and corresponding role-templates that are required.
| Area | Tasks | Role-Templates (Cloud Foundry) |
|---|---|---|
| Cloud Integration | Create/edit design time artifacts | WorkspacePackagesEdit |
| Cloud Integration | Configure artifacts | WorkspacePackagesConfigure |
| Cloud Integration | Deploy artifacts to runtime | WorkspaceArtifactsDeploy |
| Cloud Integration | Monitor runtime artifacts | MonitoringDataRead |
| Cloud Integration | Read content protected by Access Policies (Optional) | AccessAllAccessPoliciesArtifacts |
| API Management | Create/edit API Portal artifacts | APIPortal.Administrator |
Prerequisite
In order to set up OAuth clients, the following service plans need to be assigned to the subaccount’s entitlement.
| Area | Service | Plan |
|---|---|---|
| Cloud Integration | Process Integration Runtime | api |
| API Management | API Management, API portal | apiportal-apiaccess |
NOTE: For Cloud Integration, the default Process Integration Runtime service instance (with Plan = api) created using the guided Booster does not have sufficient permissions required for FlashPipe to operate correctly. Therefore it is necessary to create an additional one following the steps listed below.
(A) Creating an OAuth Client on Cloud Foundry
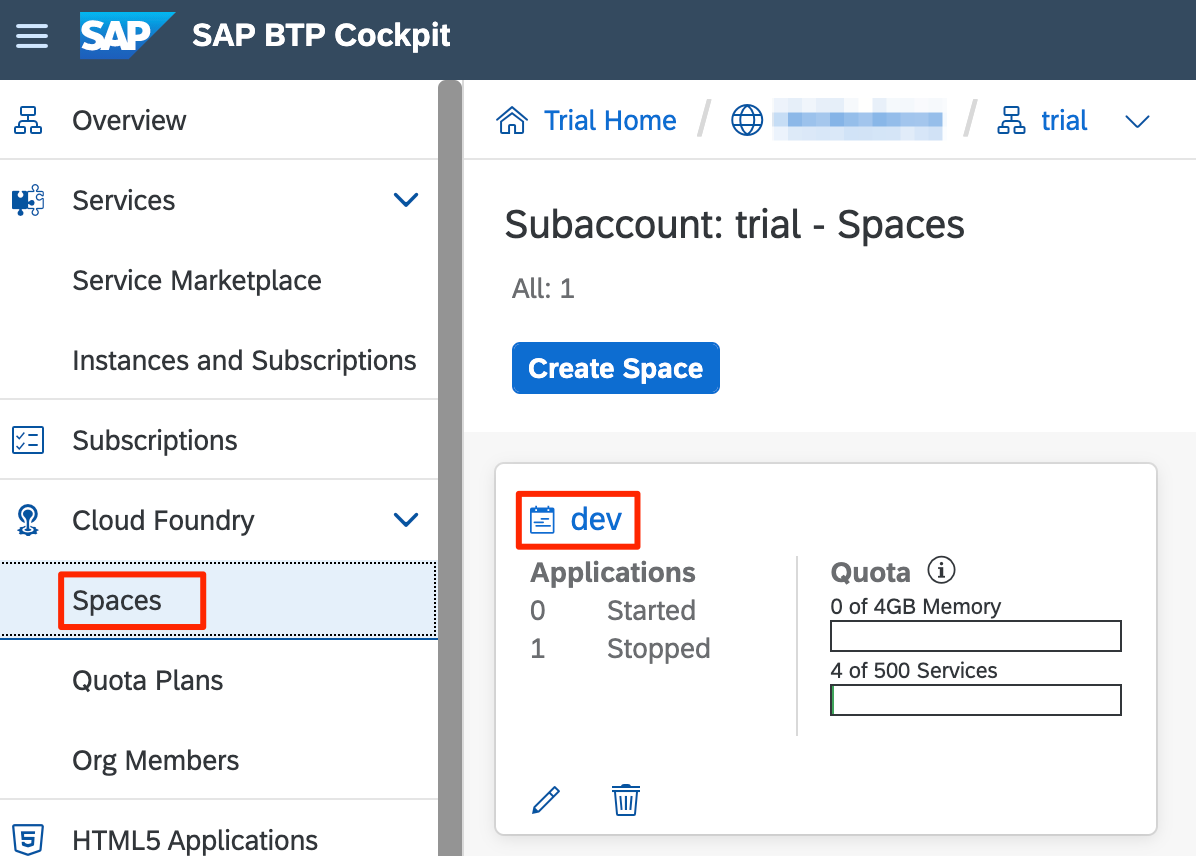
1. Logon to SAP BTP Cockpit
Access the relevant Cloud Foundry space on SAP BTP Cockpit.
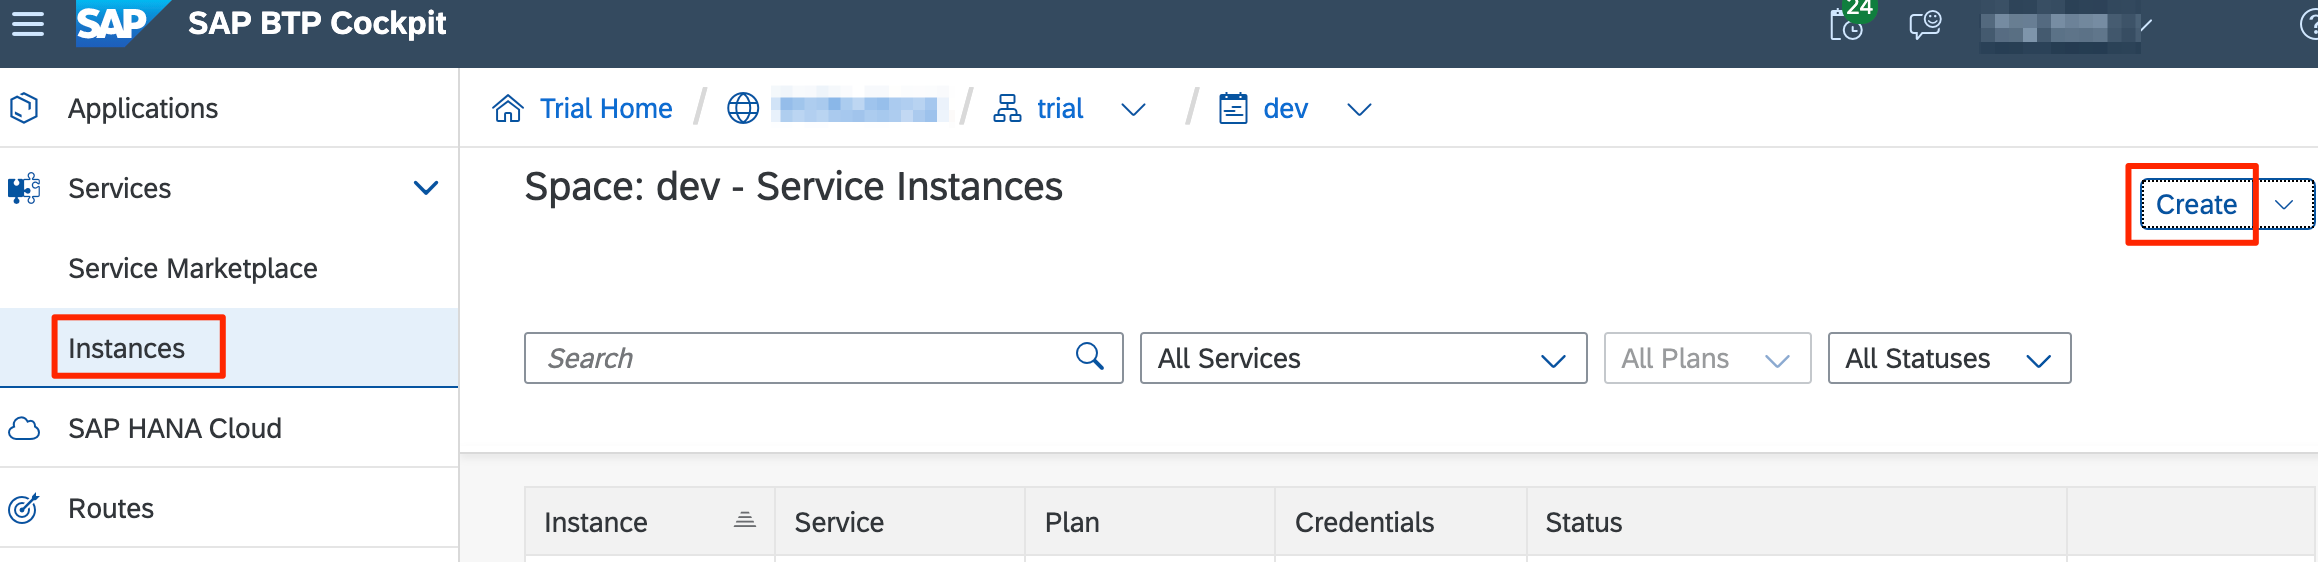
2. Create new service instance
In the space, navigate to the Services > Instances and create a new instance.
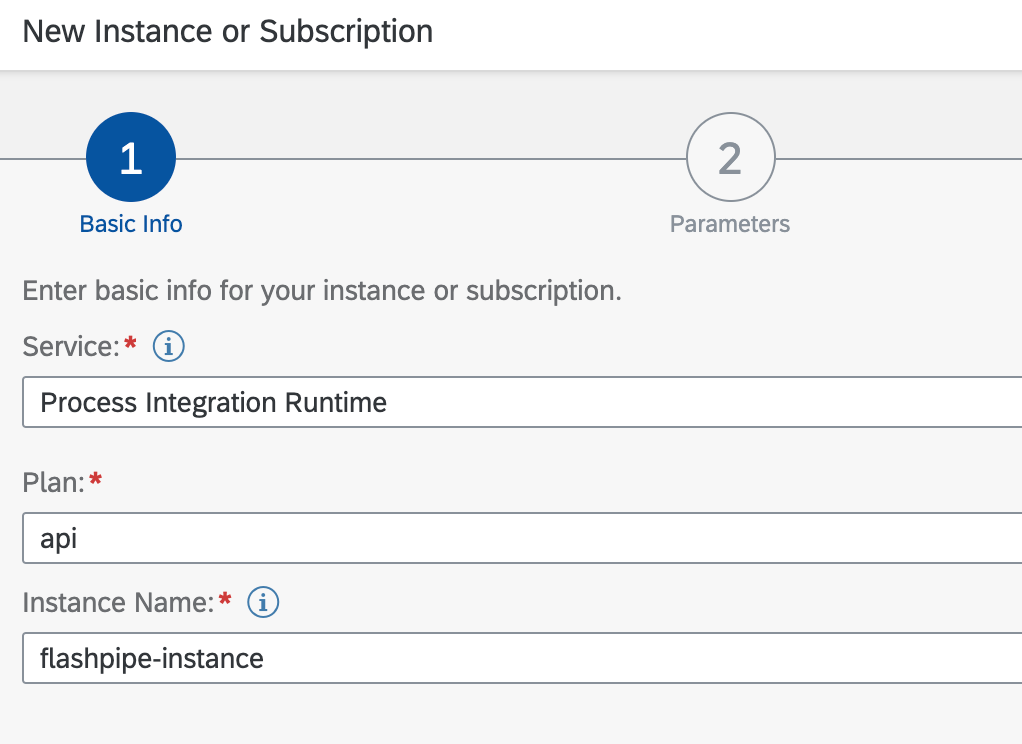
3. Enter instance details
Depending on the area, create a new instance based on the following details.
| Area | Service | Plan | Instance Name |
|---|---|---|---|
| Cloud Integration | Process Integration Runtime | api | flashpipe-instance |
| API Management | API Management, API portal | apiportal-apiaccess | apiportal-instance |
Click Next.
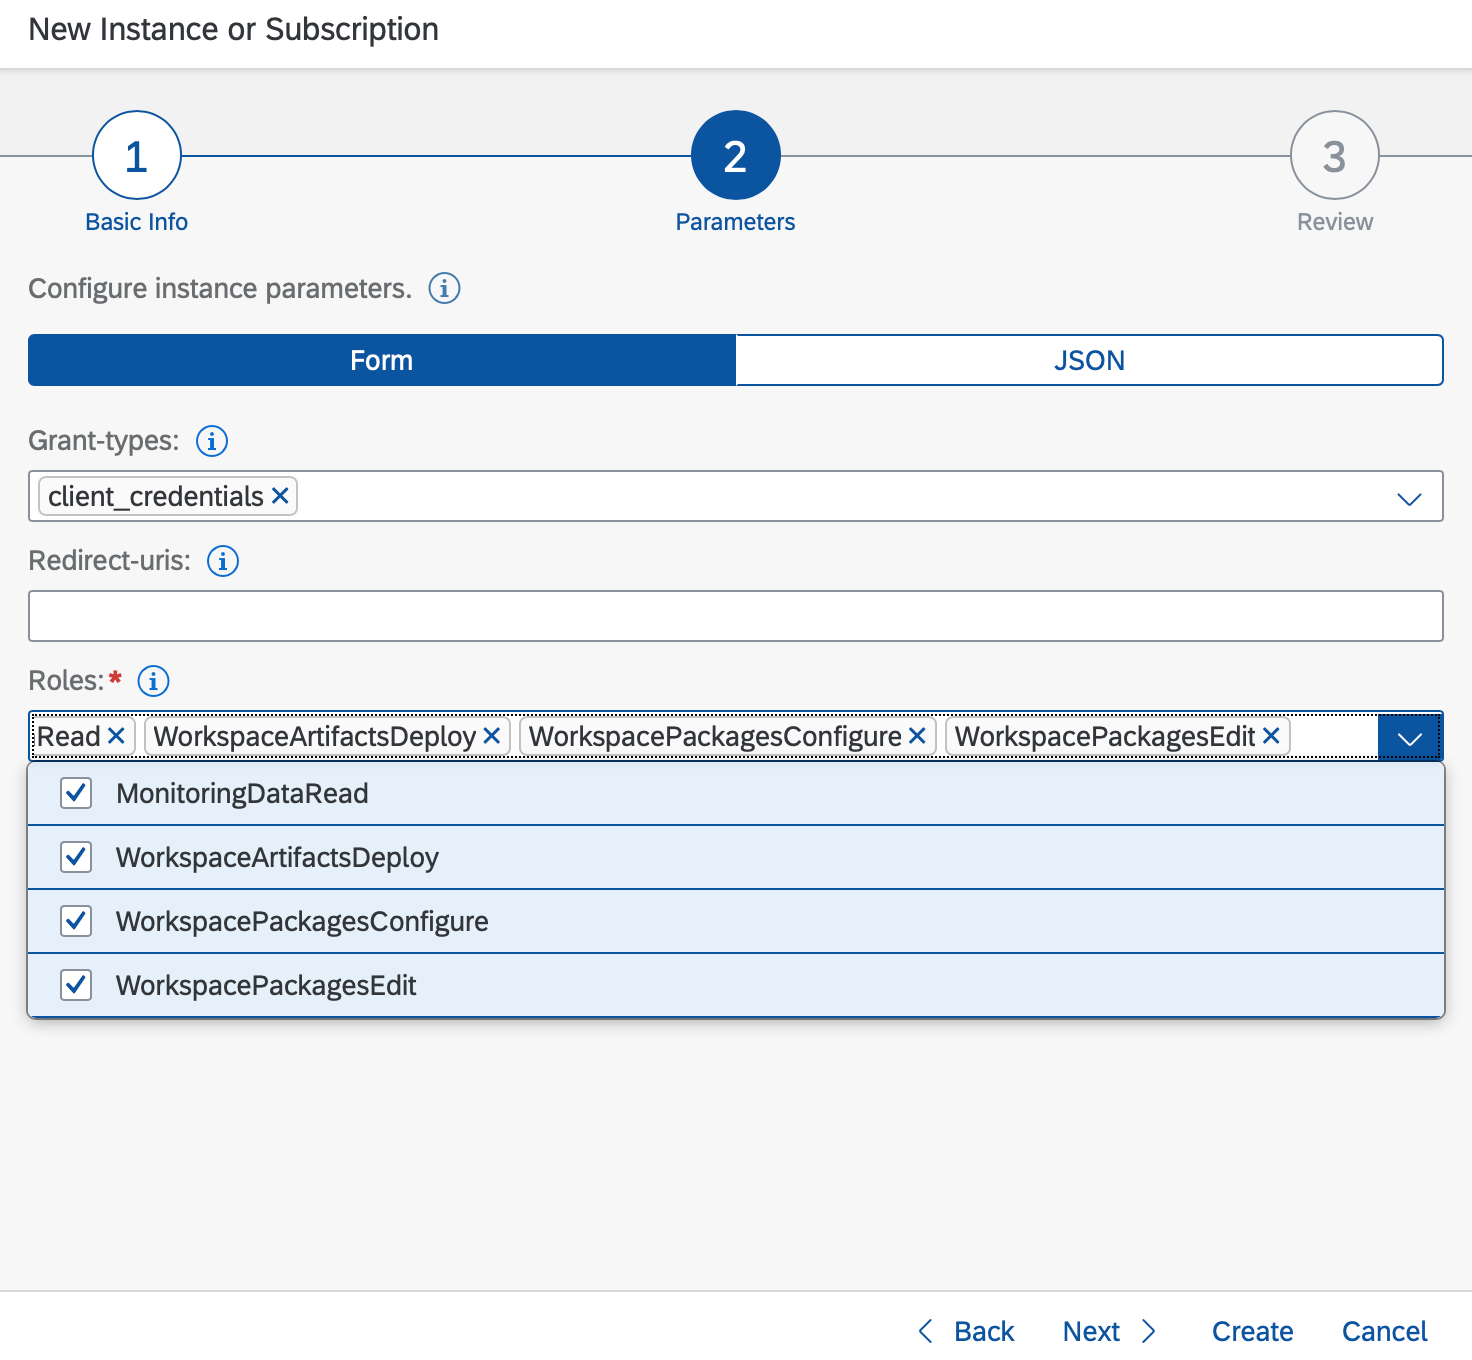
4. Enter required roles
i) Cloud Integration
Leave the default grant type to client_credentials. Select the roles listed in the roles table using the dropdown menu.
Click Next.
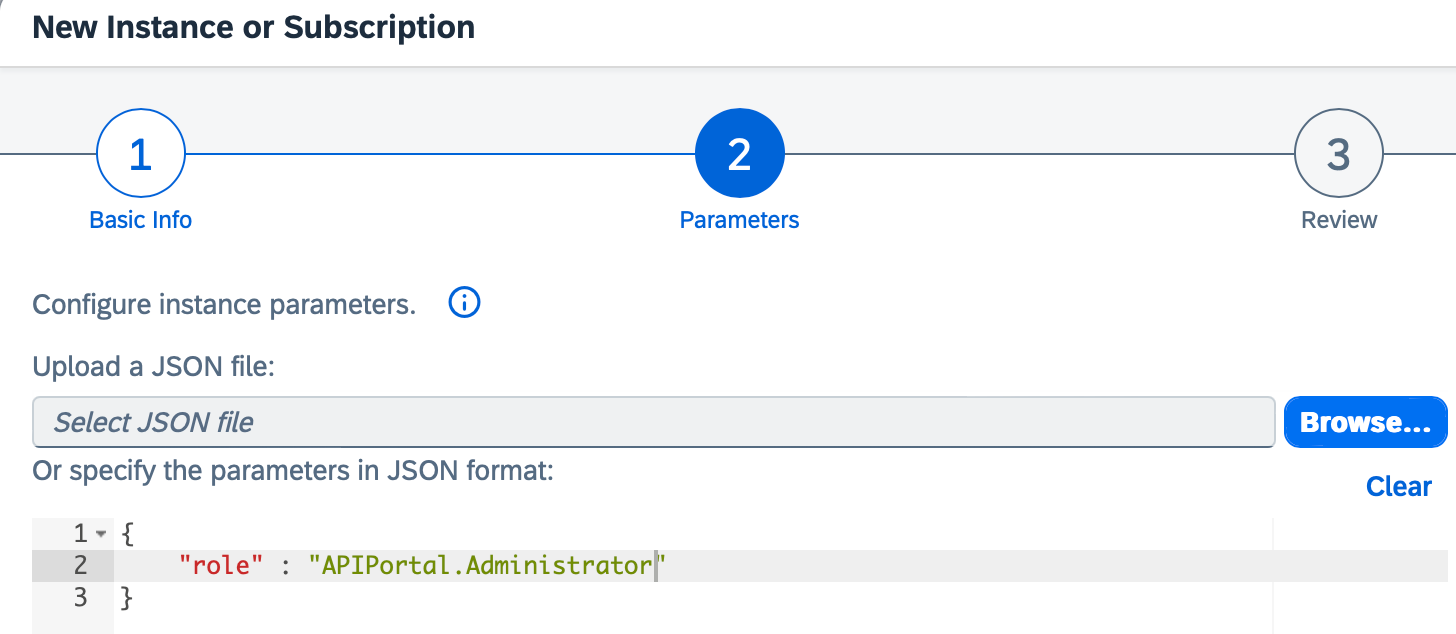
ii) API Management
Manually modify the JSON content to include the APIPortal.Administrator role.
Click Next.
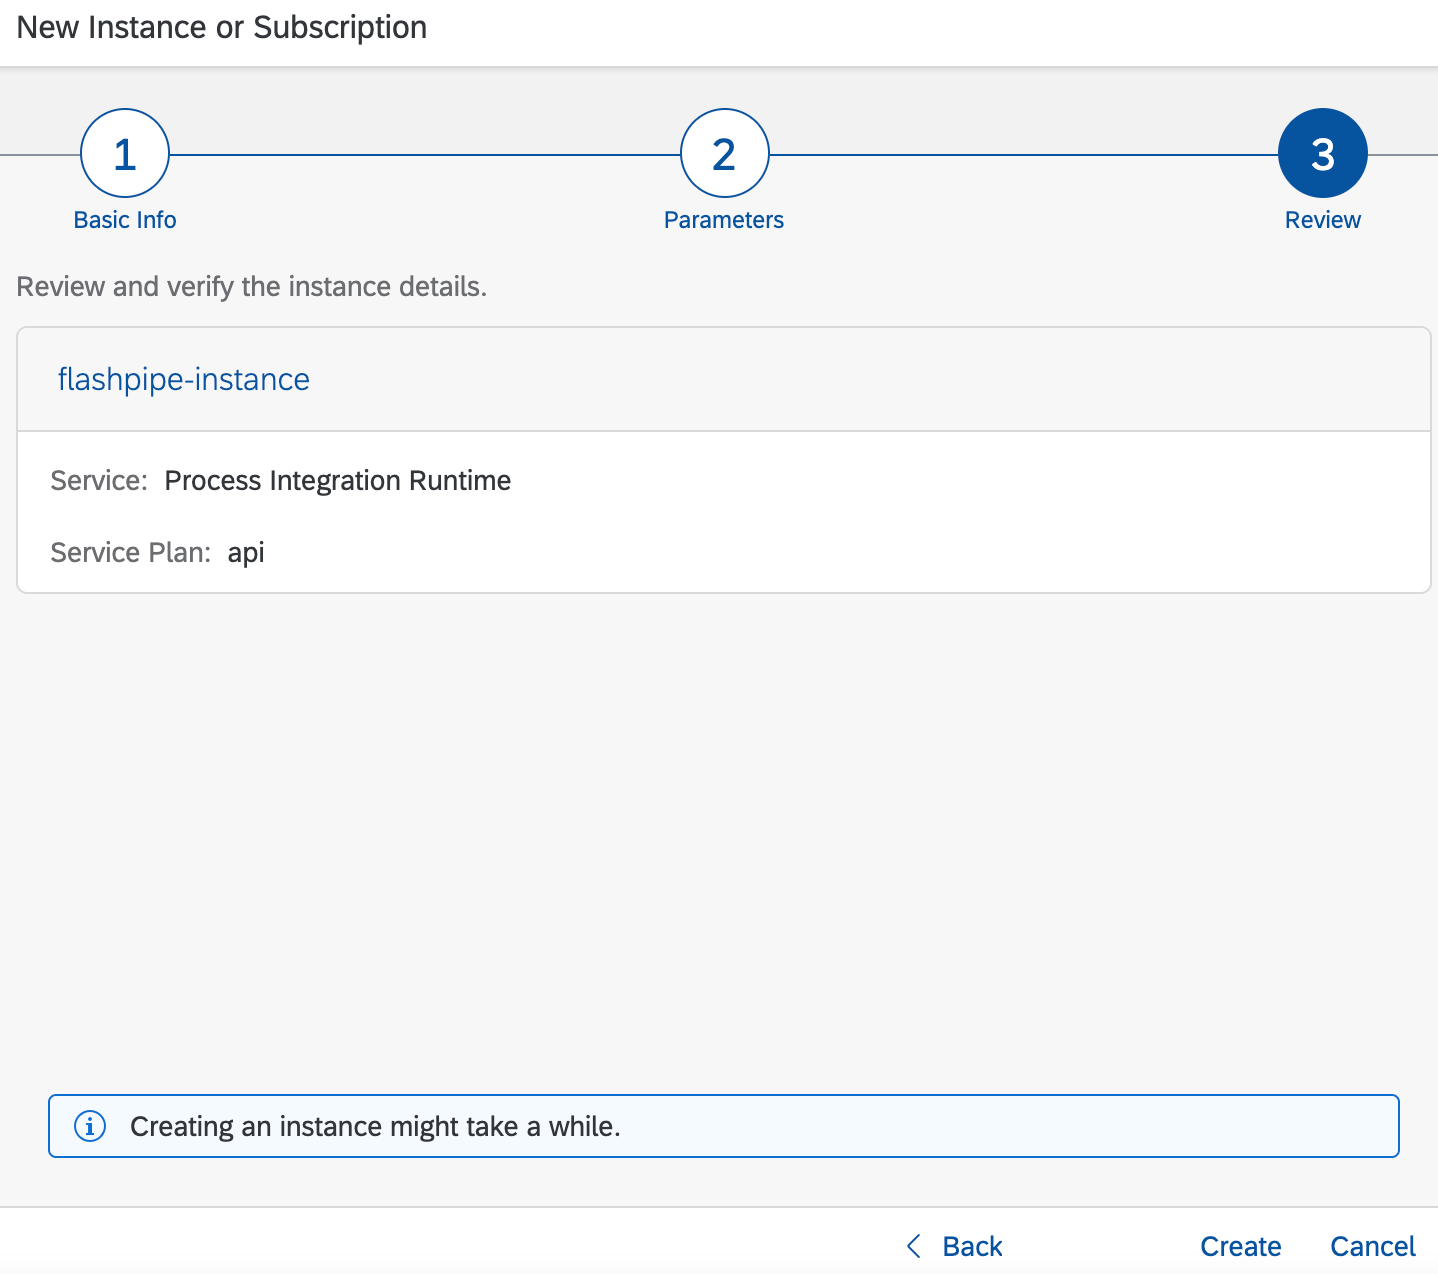
5. Review and create instance
Review the details and click Create.
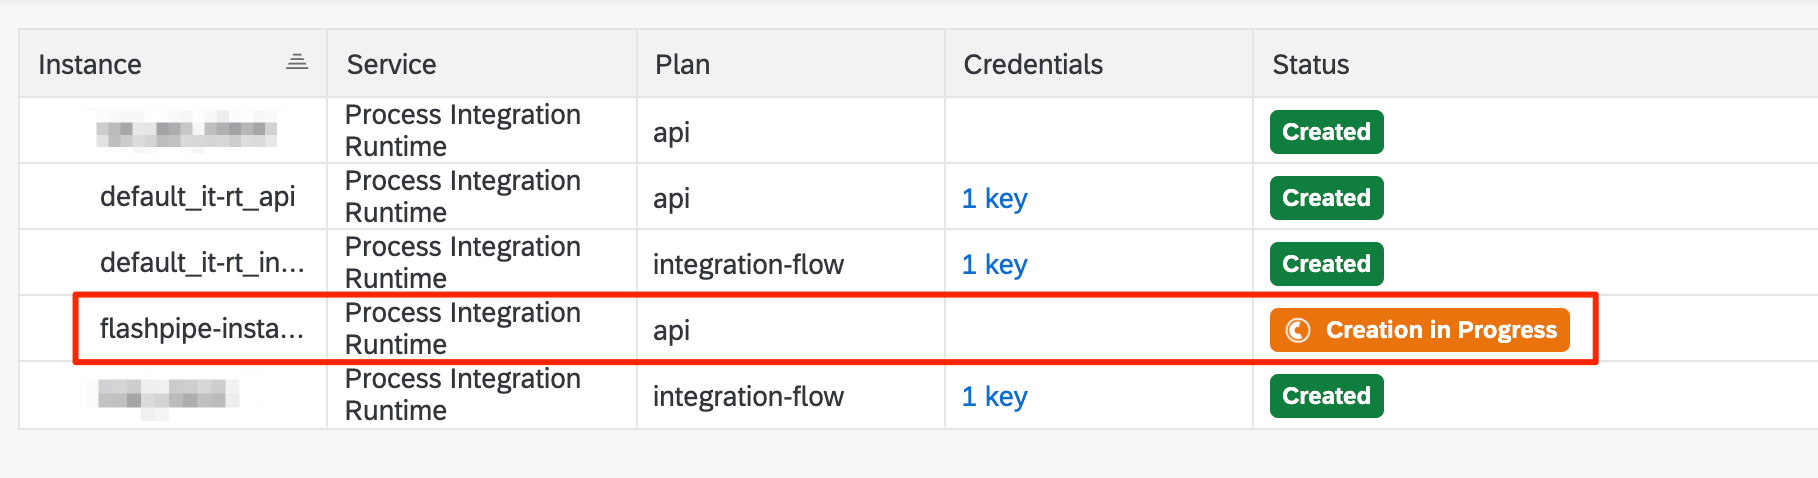
6. Wait for creation to complete
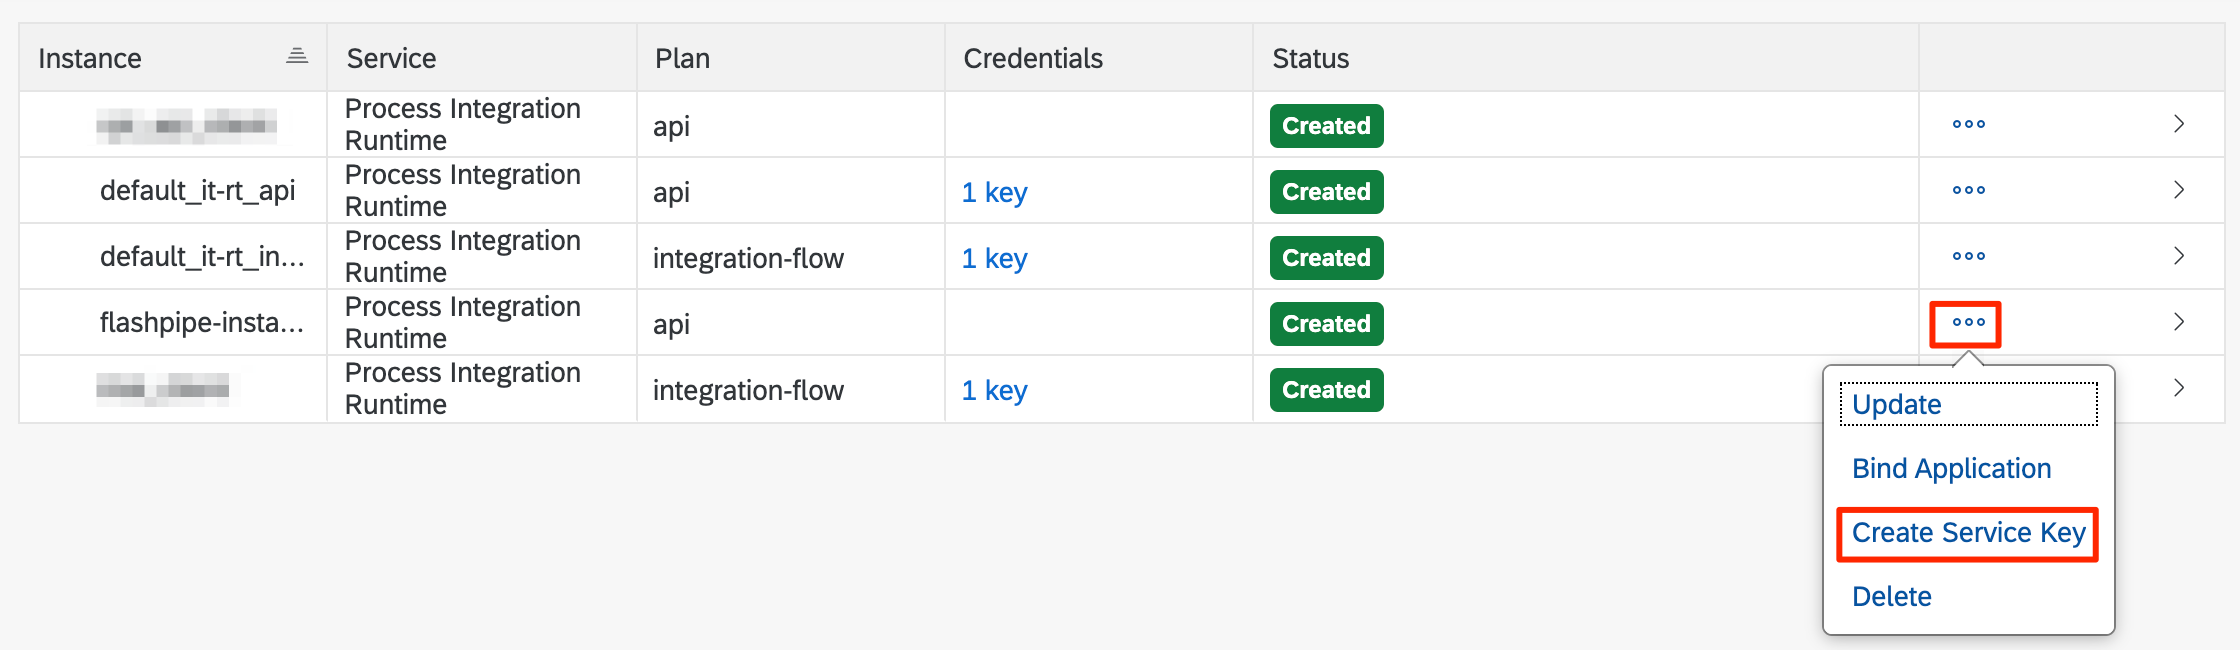
7. Create service key for instance
Once the instance has been create, click *** its line and select Create Service Key.
8. Enter name of service key
Enter flashpipe-key as the name of the key.

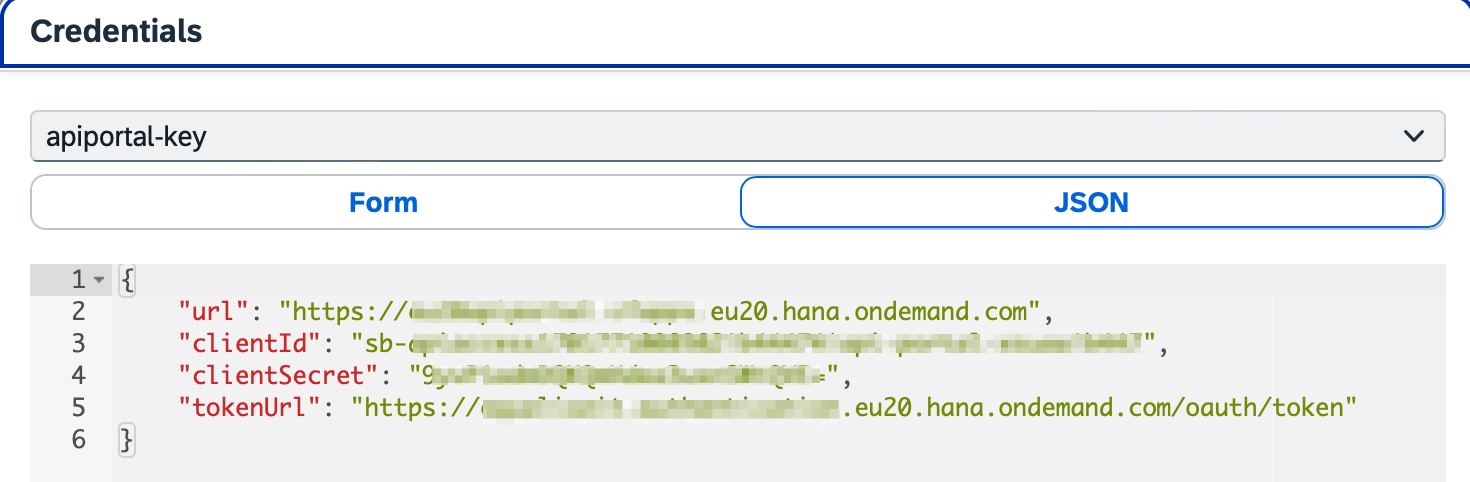
9. View credentials of service key
Click on the created service key to view the credentials. Copy the following fields that will be needed for configuration with FlashPipe.
i) Cloud Integration
clientidclientsecrettokenurl
ii) API Management
url- this is the host url for the management node of API ManagementclientIdclientSecrettokenUrl