Upload/Deploy with FlashPipe on GitHub Actions
The page describes the steps to set up FlashPipe on GitHub Actions.
Note: GitHub repository syncing from tenant can also be used in place of steps 1 and 2.
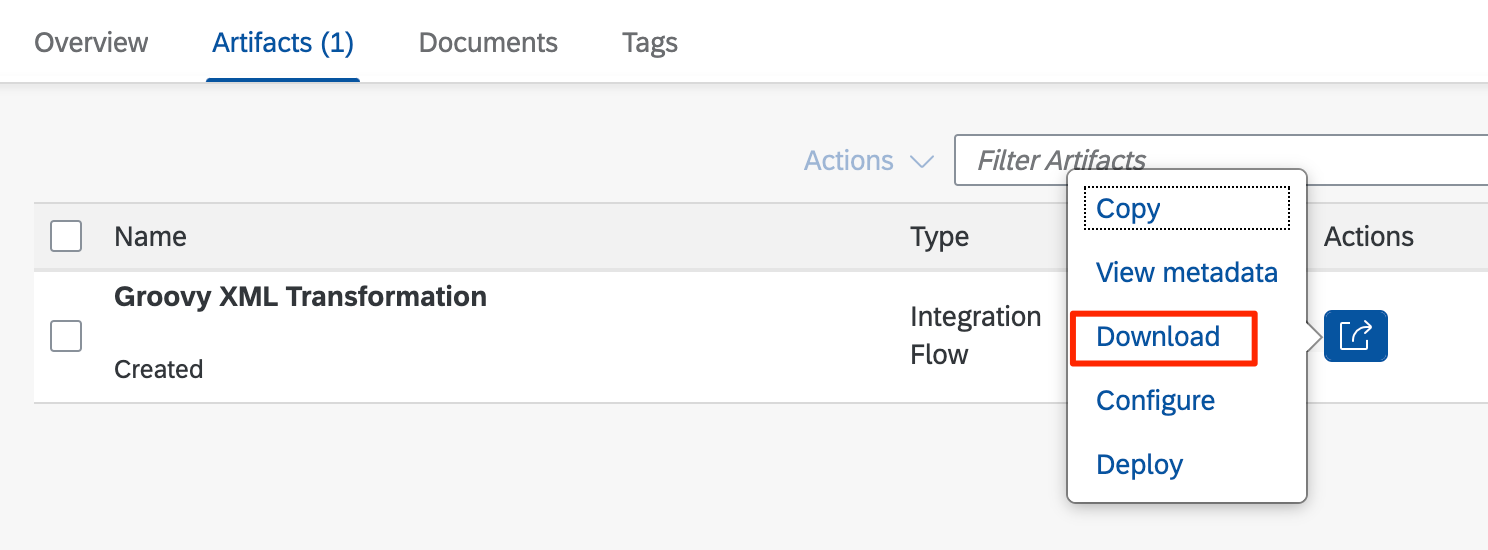
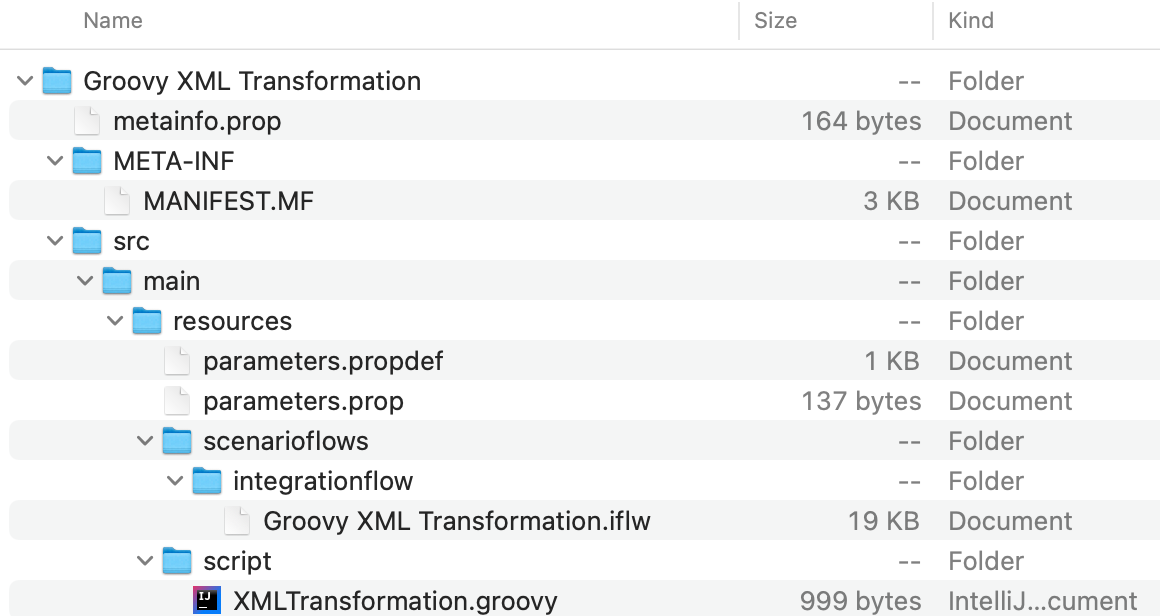
1. Download and extract content of Integration Flow
Download the content of the Integration Flow from the Cloud Integration tenant.
Extract the content of the downloaded ZIP file
2. Add content to Git repository
Add the contents to a new or existing Git repository.

3. Add GitHub Actions workflow YAML
Add a GitHub Actions workflow YAML file (<workflow-name>.yml) in the .github/workflows directory of the Git repository.
FlashPipe comes with companion GitHub Action engswee/flashpipe-action that simplifies usage in a workflow. The following actions are used in the workflow:
Template YAML with steps to create/update and deploy one integration artifact
Where:
<branch_name>- branch name of Git repository that will automatically trigger pipeline<flashpipe_version>- version of FlashPipesecrets.<name>- Sensitive information are stored as encrypted secrets in GitHub and accessed using thesecretscontext. Further explanation in step 4
Example (using OAuth authentication for Cloud Foundry)
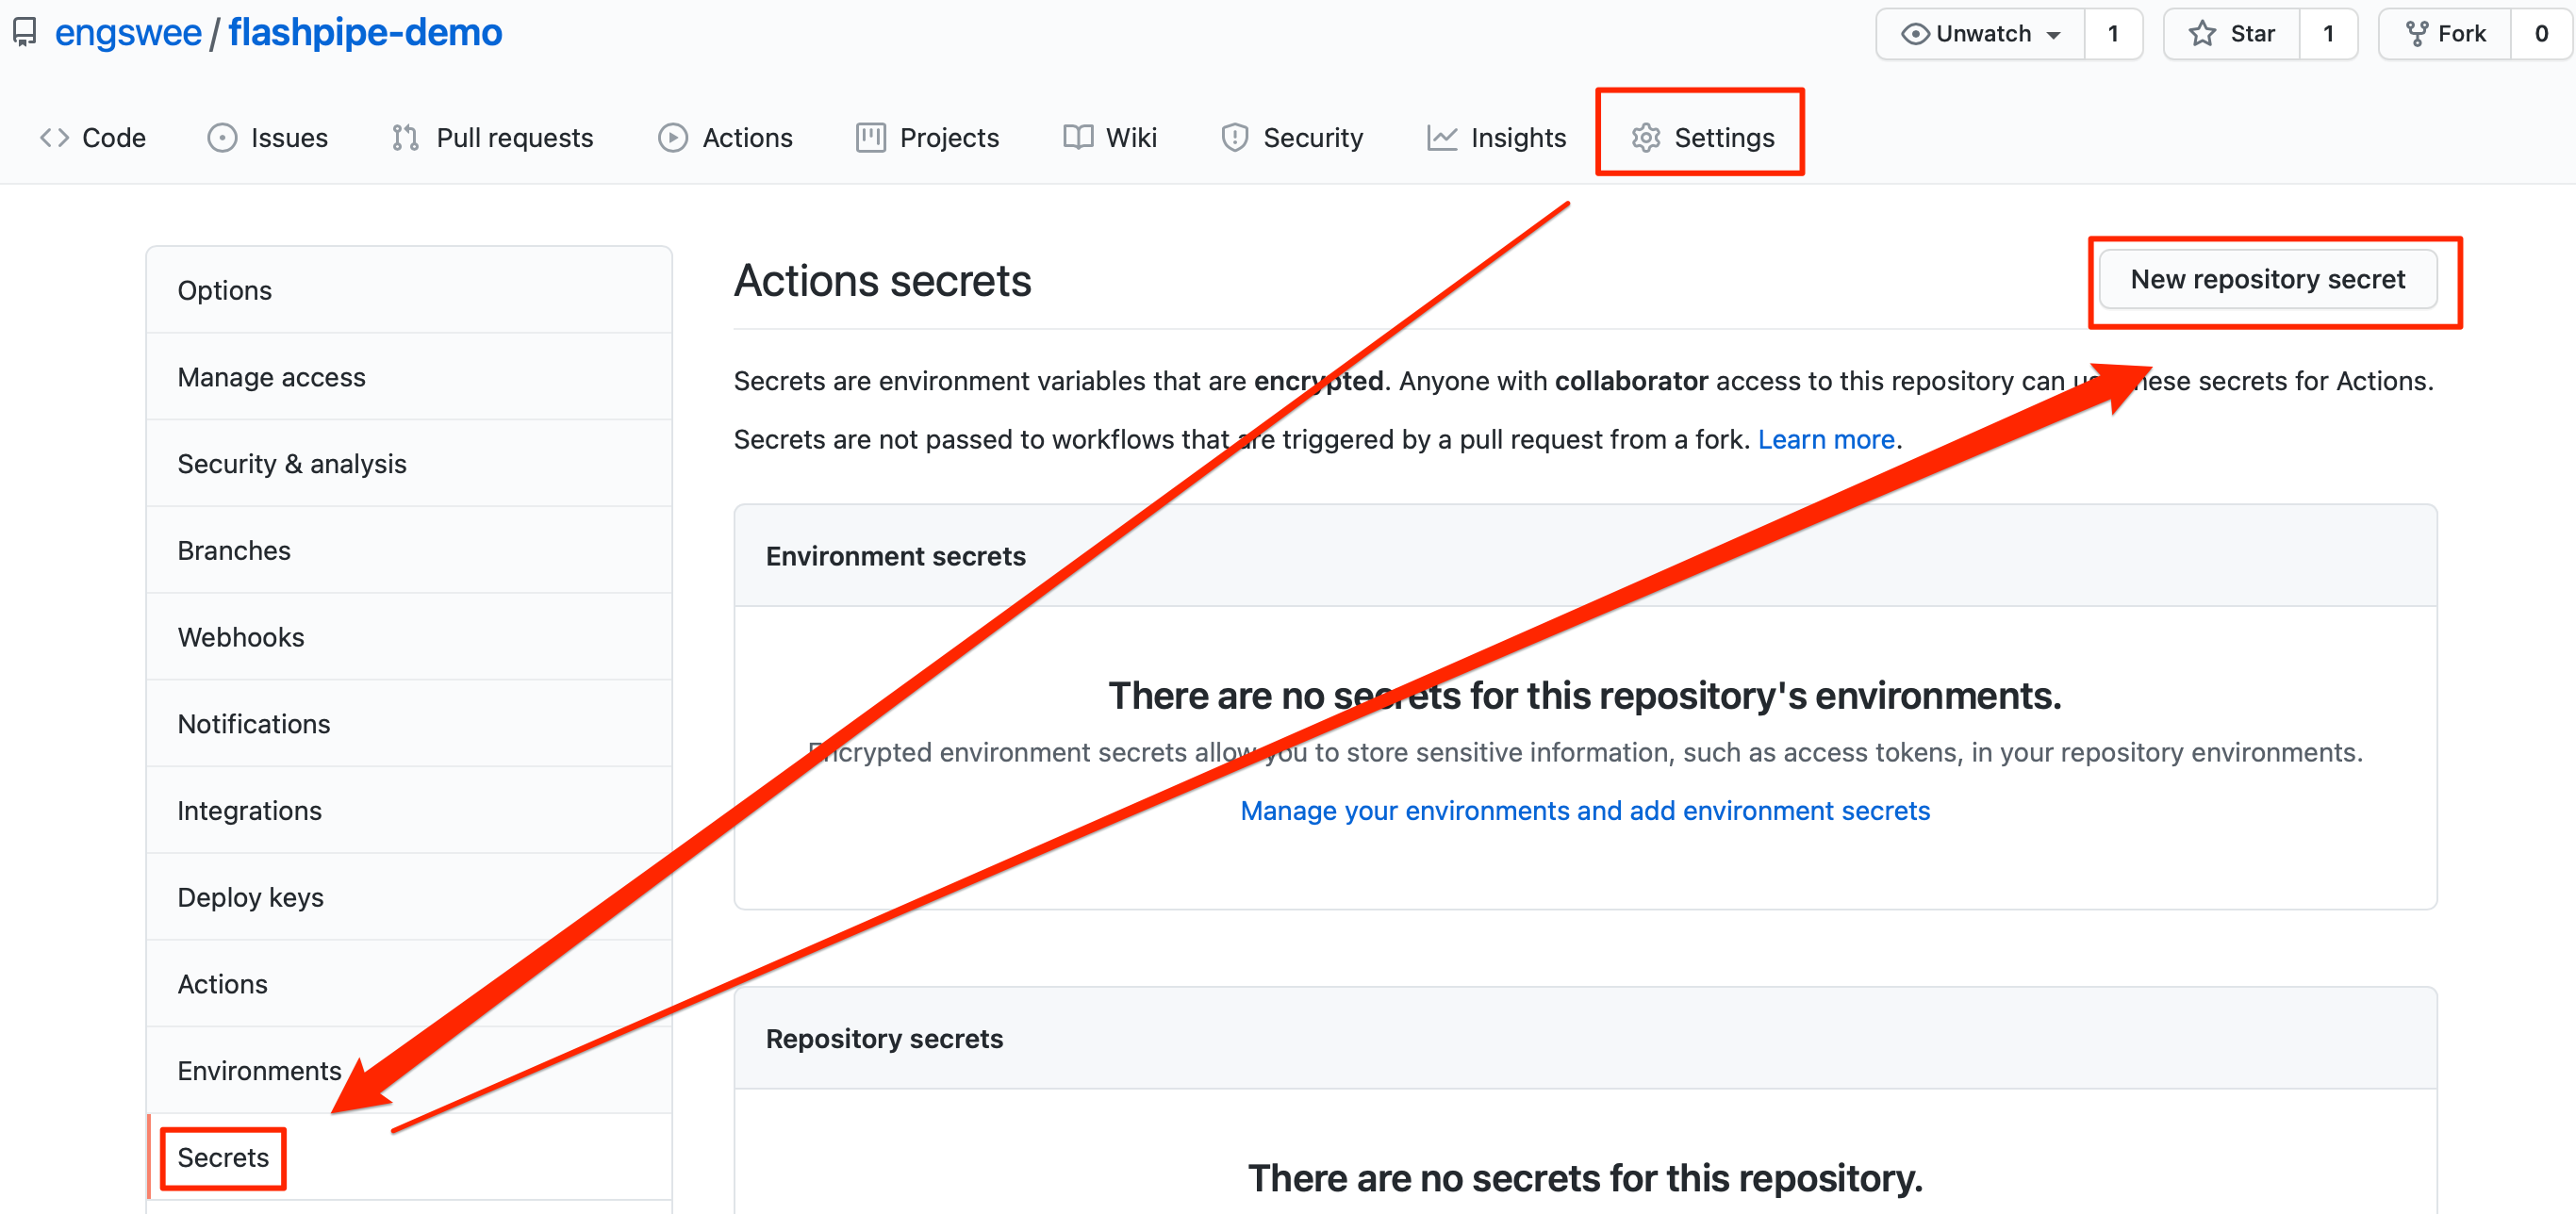
4. Create secrets in GitHub repository
Sensitive information can be stored securely on GitHub using encrypted secrets. These can then be passed to the pipeline steps as environment variables. For FlashPipe, we will use these to securely store the details to access the Cloud Integration tenant.
In the GitHub repository, go to Settings > Secrets to create new repository secrets as shown below.
Basic Authentication
Create the following repository secrets.
DEV_USER_ID- user ID for Cloud IntegrationDEV_PASSWORD- password for above user ID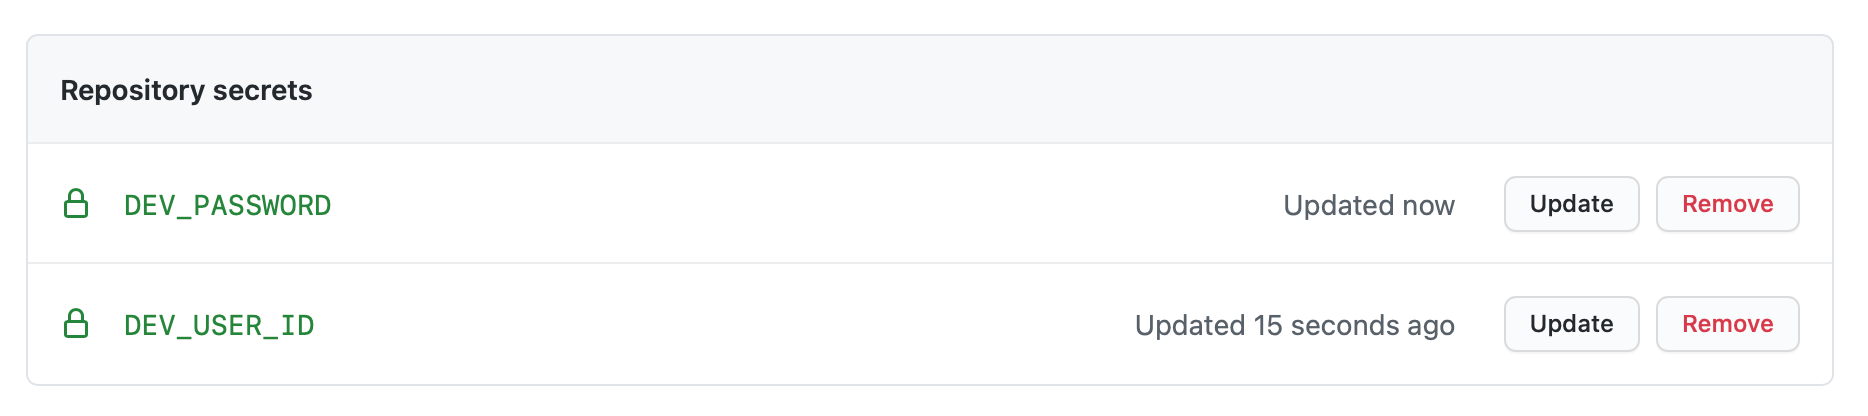
OAuth Authentication
Create the following repository secrets. Refer to OAuth client setup page for details on setting up the OAuth client for usage with FlashPipe.
DEV_CLIENT_ID- OAuth client IDDEV_CLIENT_SECRET- OAuth client secret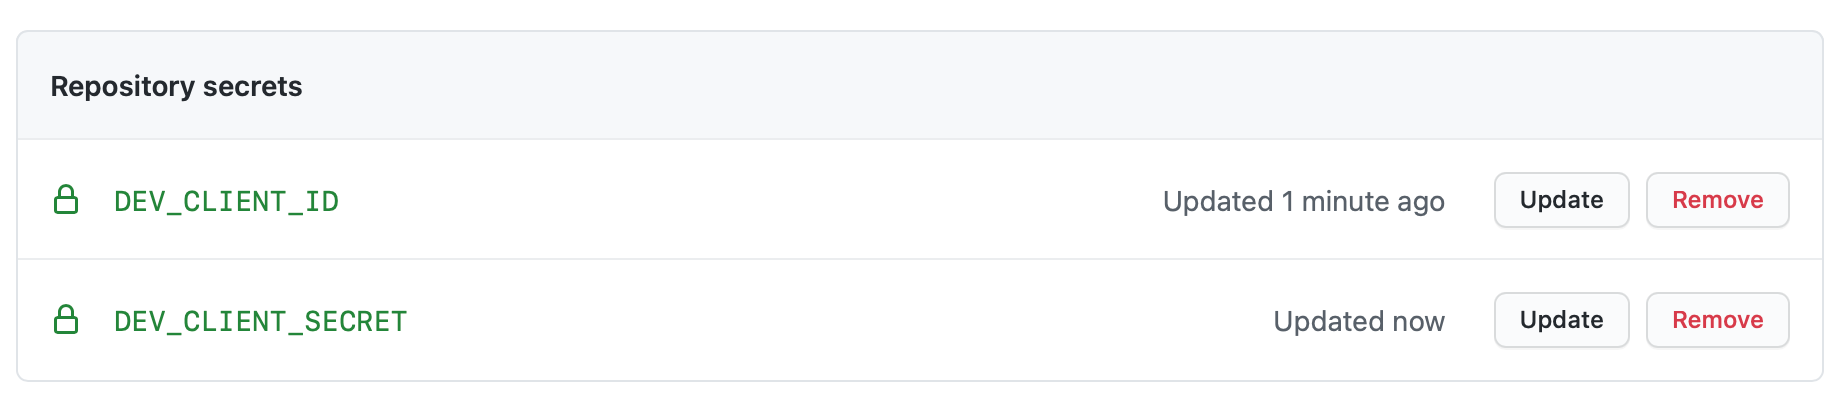
Note: GitHub provides functionality to store unencrypted plain text as repository variables. Optionally, values like base URLs can be stored as repository variables instead of being hardcoded in the YAML configuration file, and can then be access using the vars context in the configuration file.
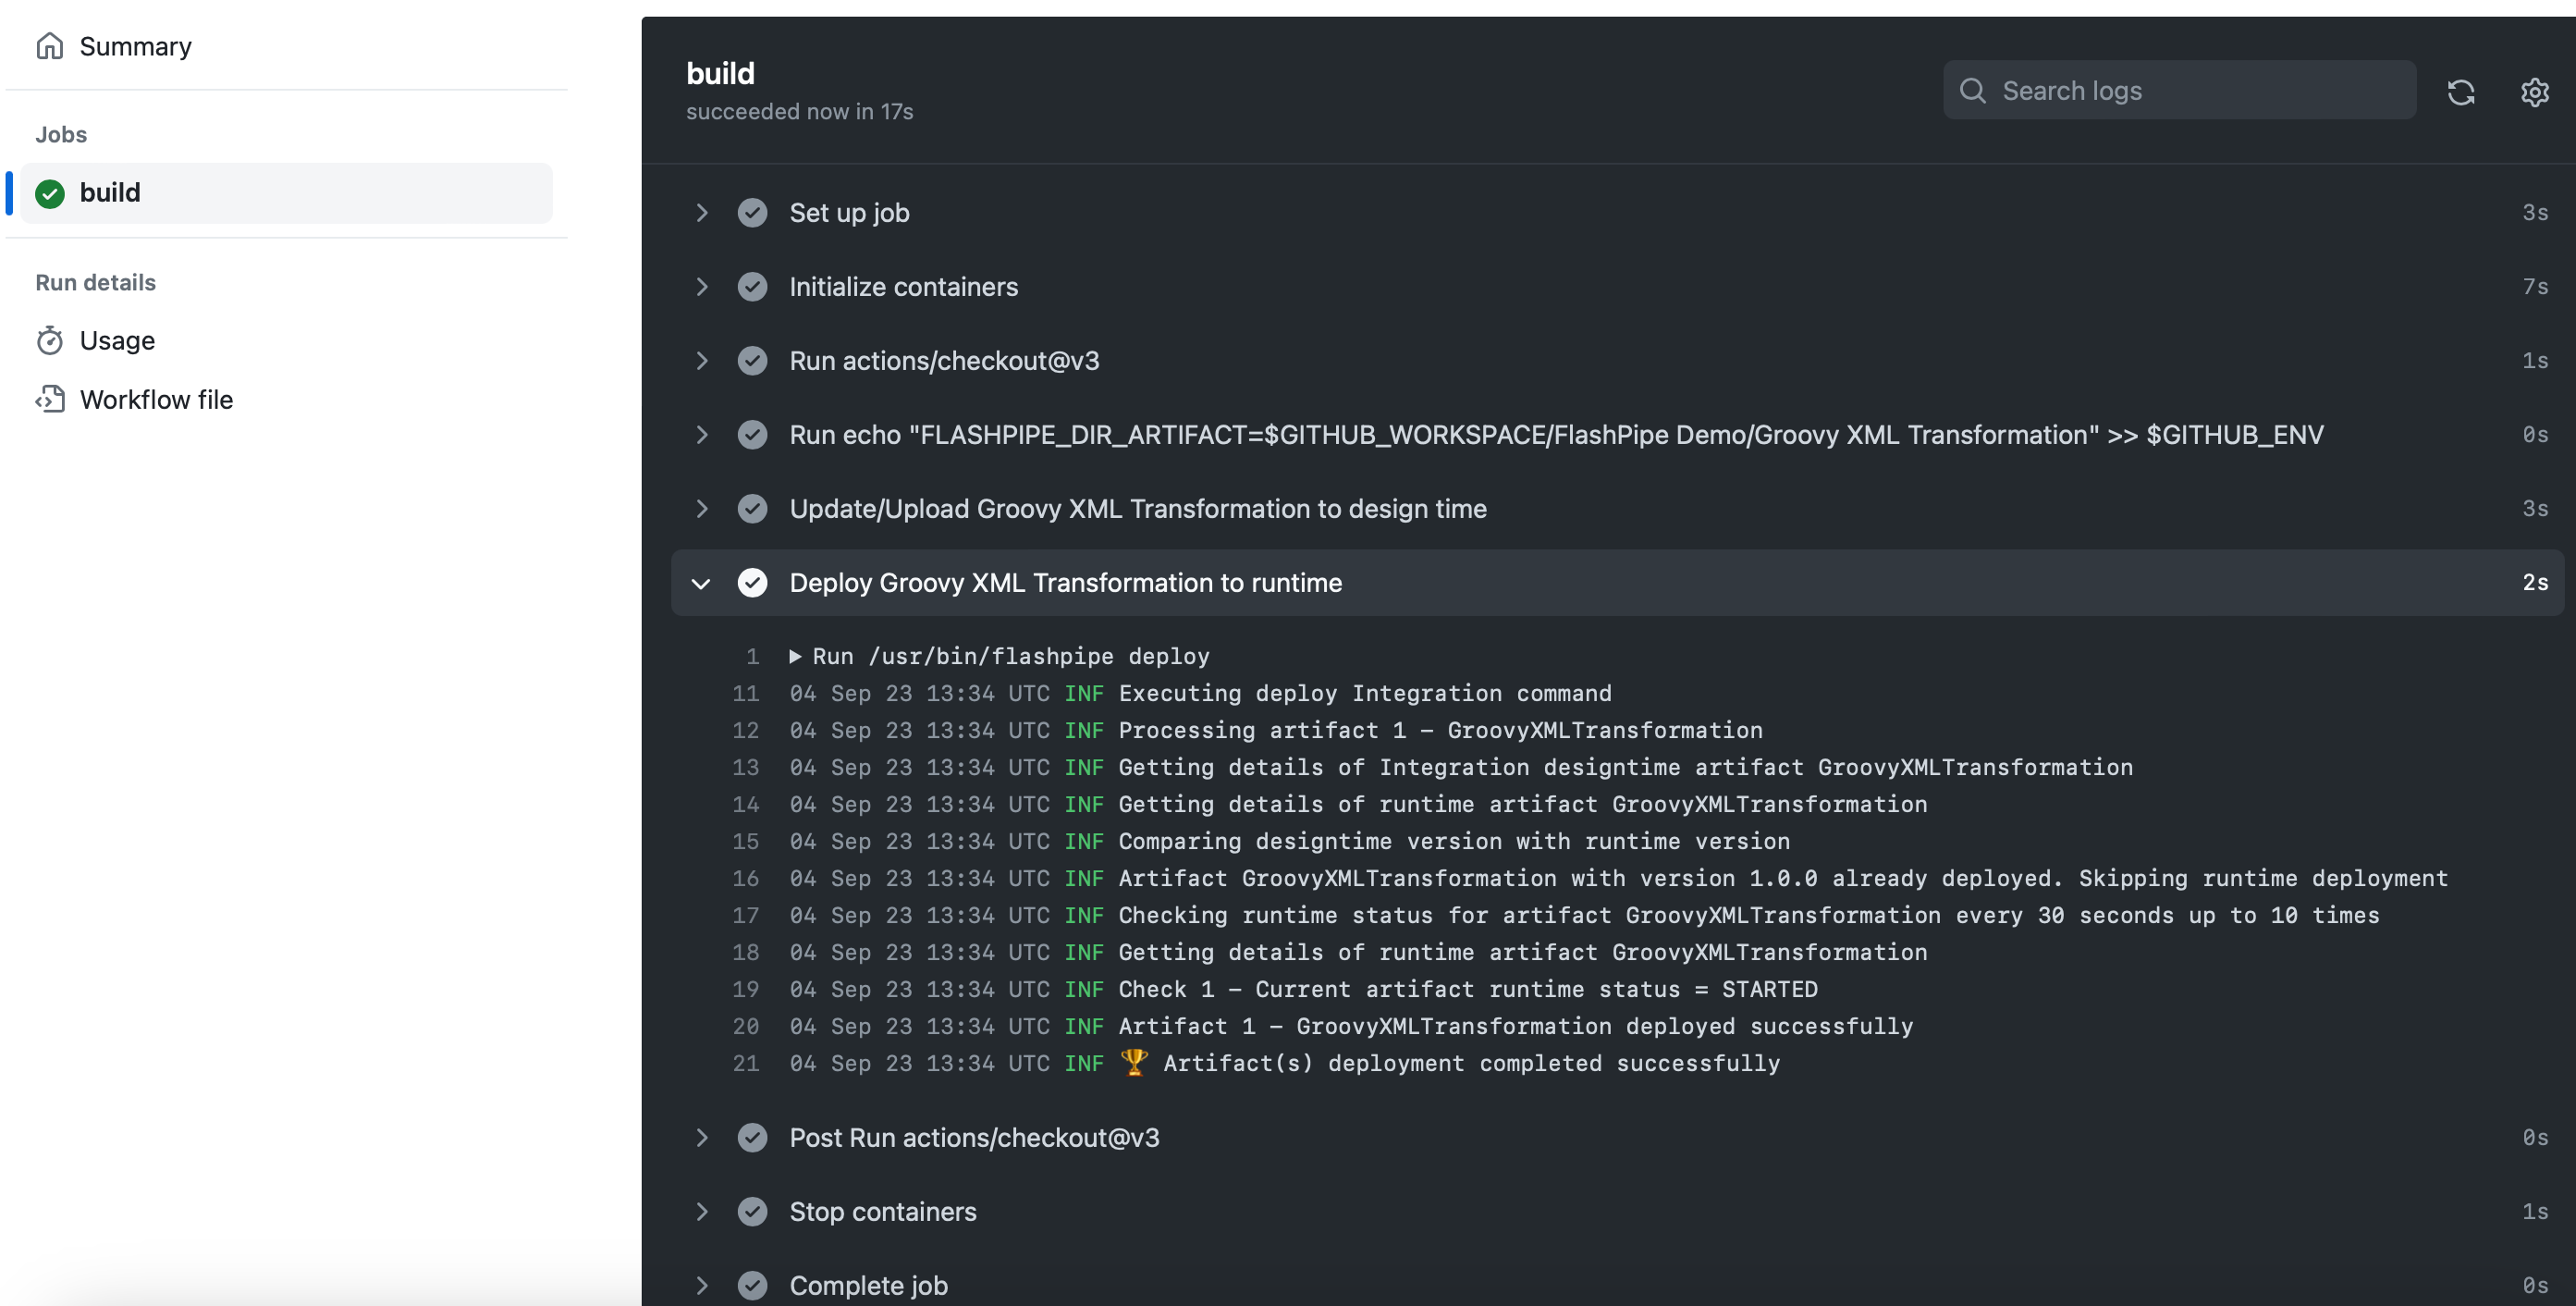
5. Commit/push the workflow YAML, and check pipeline run
Once all is in place, commit/push the workflow YAML. This will automatically trigger the workflow to be executed, you can monitor its execution and job logs. Go to Actions to view the workflows.
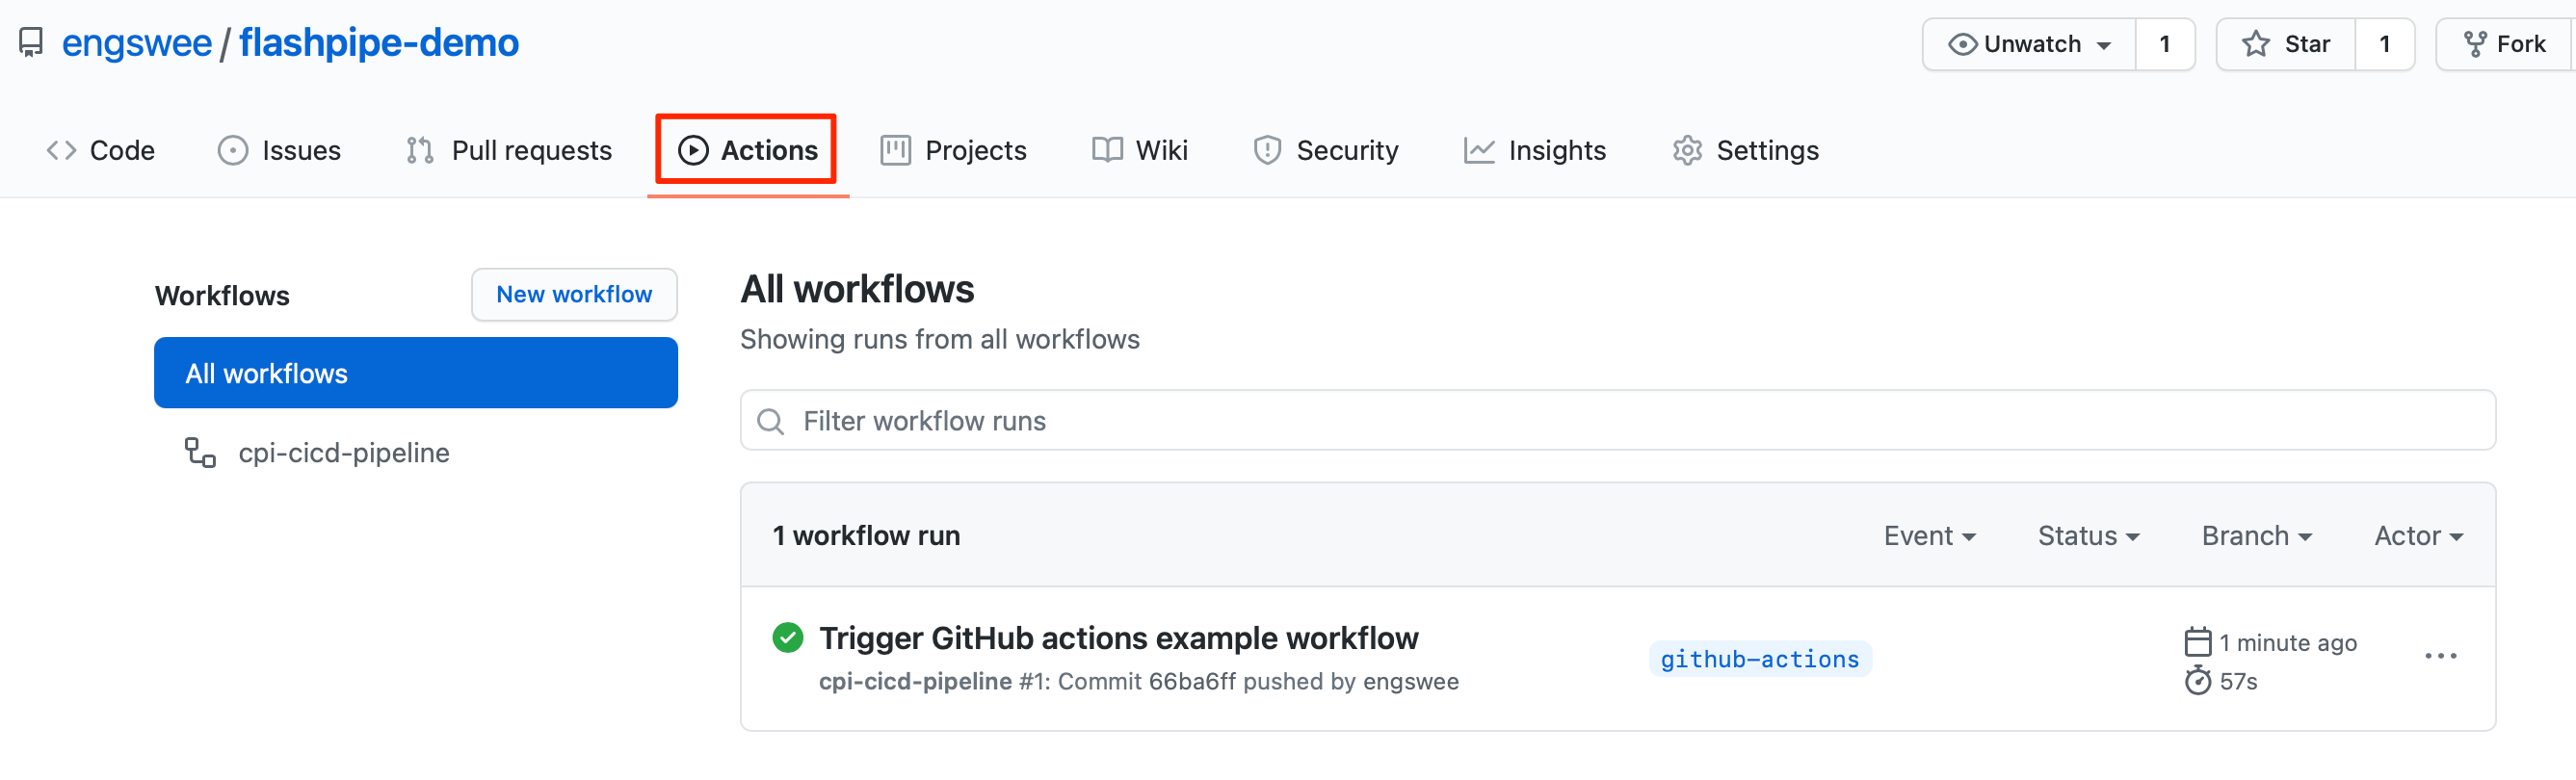
Upon completion of the run, you can review the logs, and also check the artifact (designtime and runtime) in the Cloud Integration tenant.